
In the previous section ( Part I ) I described the quick implementation of a working OnStep controller based on the Wemos D1 R32 (ESP32) and CNC3.
Now I had some time for corrections and modifications, i.e. Part II.
I changed:
- Case housing Raspberry Pi (Astroberry) and OnStep
- RJ45 ports with motor outputs
- fastening to the tube for a screw thread 1/4
- power switch and 12V power input 5.1 / 2.1
- RJ45 ports on a mount and RJ45 cable splitting the signal to RA and DEC motors
- RJ45 to 6 pin JST PH2.0mm cable for focuser
- Smart Web Server (SWS) on Wemos D1 Mini ESP32
- GamePad BT Magicsee R1 instead of Smart Hand Controller
- Astroberry and Indi server connected to OnStep via USB
- GOTO positioning and tracking adjustment in config.h
New items:
| Wemos D1 mini ESP32 | |
| 5V step-down converter | |
 | RTC DS3231 module |
 | Kradex Z78 case |
 | Bluetooth GamePad R1 |

Useful links
OnStep author's website http://www.stellarjourney.com/
Wiki WeMos R32 with CNC V3 Shield
Wiki Smart Web Server
Wiki GamePad R1 Bluetooth
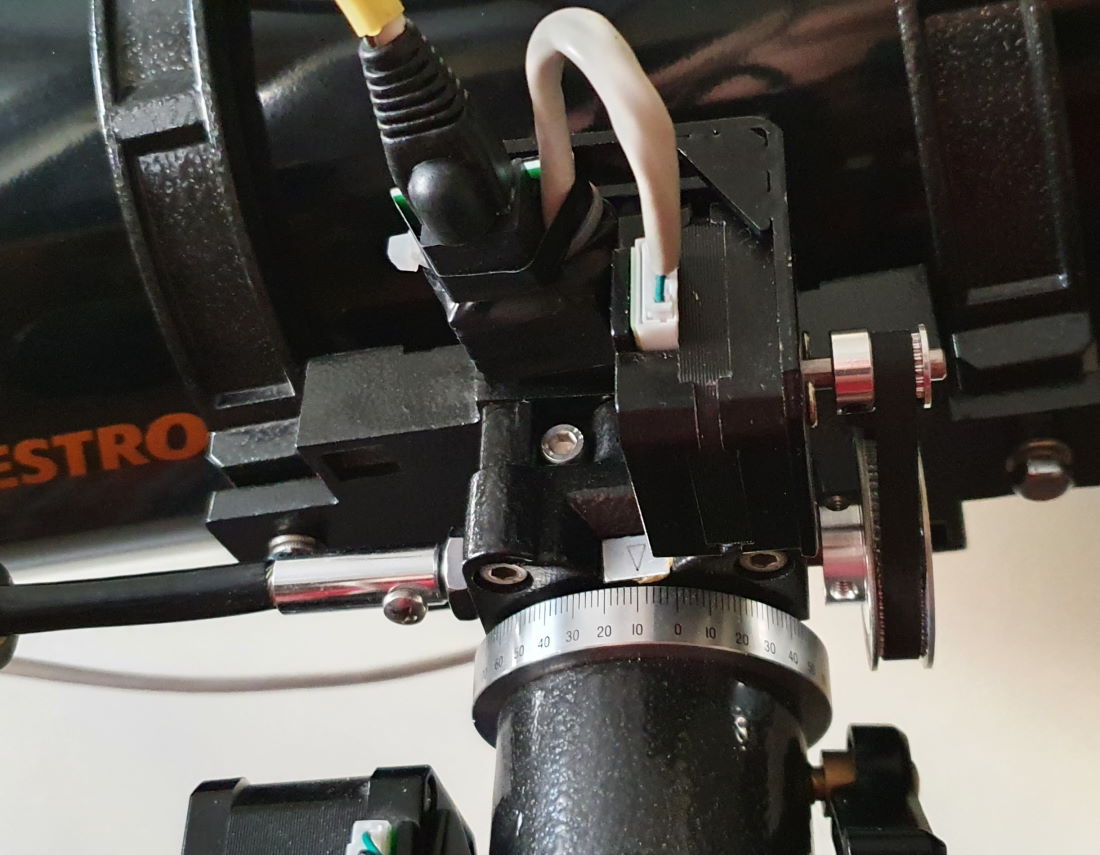
RJ45 housing and ports
I know that it would be nicer to print one of the many available enclosures on a 3D printer, but I would like to remind you that this is a budget project. I had this case at hand and its slightly larger size also solved the problem of connecting to the Raspberry Pi with Astroberry installed. A bit of cutting and soldering and the effect can be seen in the photo.

Cables
Putting it all together was harder than I thought. The cables had to be easy to connect, but at the same time they had to behave properly during the rotation of the C4 (EQ3-2) assembly. A decision had to be made where to place the housing to minimize cable bending as the telescope moved. I chose to place the housing into the telescope tube. This keeps the cable to the focuser and the DEC motor stationary. Only the RA axis cable will have to withstand regular bending. Time will tell if the cable and RJ45 connector can handle it well.

Smart Web Server and GamePad R1
I was about to not connect the SWS anymore. Bluetooth connectivity with OnStep works acceptable, in addition, Indi on Astroberry provides many functionalities. But experience with the use of OnStep has shown that, unfortunately, a small adjustment is often required. Doing this on your phone in the OnStep app is a bit of a pain, especially without looking at the screen. That's why I got interested in GamePad. It was a bull's eye.
It is very easy to use and handy. By the way, because it requires a Smart Web Server, I also have a wireless connection with a greater range than bluetooth. Additional advantages of SWS are the ability to connect more than one device at a time, a website, automatic connection to the WiFi network at home, and if it is not available, then issuing your own AP. No need to constantly restart the whole thing. All I had to do was provide a stable 5V. The one taken from the CNC was too weak. A Step-Down converter connected directly to the input 12V solved the problem.


Installing SWS for GamePad
Detailed instructions for installing SWS with GamePad support is here . In short, you should:
- Download the SWS code from GITHUB by selecting Code -> Download ZIP
- Unpack to some directory and open in Arduino IDE
- Add in File-> Preferences "Additional Boards Manager URLs" value "https://raw.githubusercontent.com/espressif/arduino-esp32/gh-pages/package_esp32_index.json"
- In Tools> Motherboard> Boards Manager to install ESP32 version 2.0.0
- Set in the menu Tools-> Board-> MH ET LIVE ESP32MiniKit and Partition Scheme-> No OTA (Large APP)
- Select the port that will appear after connecting ESP32 to USB (the number can be checked in the Device Manager)
- In the Extended.config.h file, turn on BLE_GAMEPAD ON and enter the MAC address of our GamePad in the BLE_GP_ADDR line.
- Press "Upload" and wait for the message that it was successful.
New connectivity
Connectivity with OnStep can be provided in 4 ways.
1. USB cable connected to the Wemos D1 R32 port. In my case, this is how I connect to Astroberry on the Raspberry PI 4B, which is running the Indi server.
2. WiFi connectivity and control via IP port and Smart Web Server page. Very stable and works on multiple devices simultaneously.
3. Bluetooth connectivity . Works, but requires pairing and re-pairing after restart. At least that's how it is with me.
4. Wireless GamePad controller . If the MAC address of the device is correctly entered in the SWS configuration, then after switching on, its diode will flash blue for a while, when it goes out it means that the connection has been established. You should also activate the mode by pressing M and D simultaneously (the diode will blink once). From now on they work:
- Joystick = N, S, E, W
- Trigger up = Focuser -
- Down trigger = Focuser +
- A = Go to last location
- B = Spiral search
- C = Speed reduction
- D = Speed increase
- M = Park / UnPark (M is also an "emergency stop" of motors)
Summary of the second stage


Brak komentarzy:
Prześlij komentarz