Pokazywanie postów oznaczonych etykietą telescope. Pokaż wszystkie posty

czwartek, 18 stycznia 2024

Podłączenie wyciągu Crayford GSO RC-6 (Ritchey-Chretien) do OnStepX


    Kupiłem teleskop GSO Ritchey-Chretien RC-6. Teleskop jest w wersji DeltaOptical. Ponieważ będę go wieszał na na montażu CG5 (EQ5) z napędem OnStepX, muszę podłączyć ustawianie ostrości również do sterownika. W GSO RC6 jest focuser Crayford z mikroruchami w wersji bez otworów montażowych, pozwalających łatwo przykręcić silniczek Nema17. Obejrzałem różne rozwiązania w Internecie, ale mnie nie przekonały. Postanowiłem zaprojektować własną podstawkę pod silniczek i przy okazji nauczyć się programu FreeCAD.

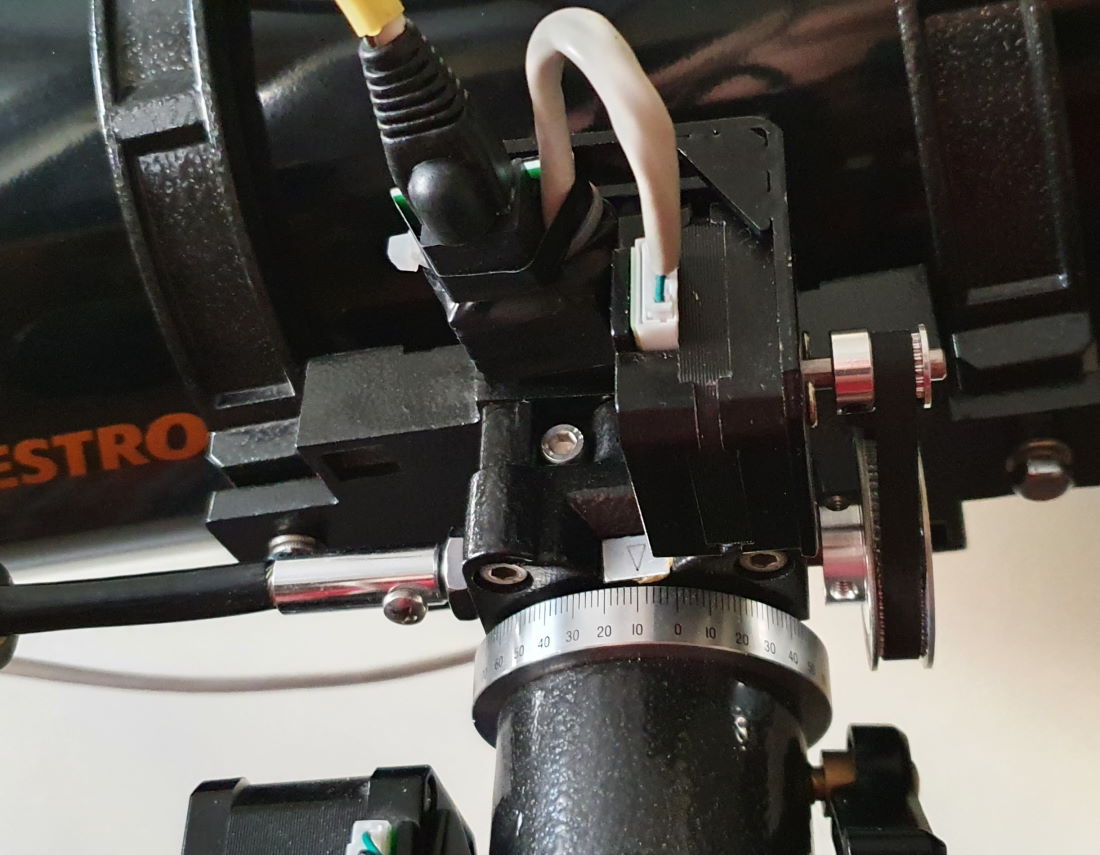
    Zbudowałem model z tektury i podkładek, który pozwolił mi poznać potrzebne odległości, pochylenia i przeszkody. Zastosowałem popularny u nas silnik 17HS4023, bo taki miałem pod ręką i pasek 154mm. Jednym z najważniejszych założeń był mały rozmiar. Chciałem by silnik jak najmniej odstawał od wyciągu, tak by nie trzeba było go demontować w czasie transportu. Efekt poniżej.

Modelowanie mocowania Nema17

    Od razu wyszło, ze silnik jest nadal za wysoki. Wtedy odkryłem na Aliexpress silniczek trochę mniejszy od Nema17, choć z rozkładem śrub Nema17: 17HS08-1004S. Mała moc nie przeszkadza, bo napędzam pokrętło mikroruchów, które chodzi bardzo lekko. Zastosowałem też krótszy pasek 150mm.


    Zaprojektowana przeze mnie podstawka jest minimalistyczna. Śruby silnika wkręca się od spodu (trzeba zastosować trochę dłuższe). Całość mocuje się do wyciągu za pomocą opasek zaciskowych (trytytek). Warto znaleźć takie, które dają się wielokrotnie zaciskać. Pasek zębaty najlepiej 150mm przy zębatce 16 zębów. Pasek powinien mieć luz. Dzięki temu łatwo go można zdjąć i używać fokusera klasycznie. 


    Nie rozwiązałem jeszcze problemu kabelka. Gniazdo od strony silnika to JST-ZH o odległości między pinami 1,50mm, liczba pinów 11. Kabel dostarczony z silnikiem ma 40cm. Trochę mało jeśli sterownik będzie mocowany do statywu teleskopu. W Polsce nie znalazłem takich wtyczek. Są z mniejszą liczbą pinów i musiał bym je jakoś kleić. Na aliexpress znalazłem 10 lub 12 pinów więc też nie pasuje. Znalazłem jedną ofertę na 11 pinów, tylko trzeba kupić 100szt.

    Podpięcie do mojego OnStepX pracującego na FYSETC E4, jest łatwe. Płytka ma obsadzone zapasowe sterowniki silników. Trzeba jedynie ustawić większą prędkość obrotową, by zmiana ostrości pracowała optymalnie.


    W planie mam zaprojektowanie podstawki ver.2, która powinna mieć większy zakres regulacji odstępu od pokrętła i może będzie trochę wyższa.

     Może jeszcze krótko o programie FreeCAD. Jest genialny, nie jest trudny, a pozwala projektować skomplikowane elementy. Używałem wersji 0.20.2. Może moja porada się komuś przyda. Ja zmarnowałem kilka godzin, zanim odkryłem tą zasadę. Jeśli chcesz zmienić nazwę czegokolwiek np. części, zrób to zaraz po jej stworzeniu. Program pozwala to robić na dowolnym etapie, ale często pojawiają się potem błędy przy zupełnie niewinnych operacjach.  

    Na koniec kilka zdjęć całości:


poniedziałek, 24 lipca 2023

Change to OnStepX FYSETC E4

Automatic translation (Original)

I decided it was time to make the switch to OnStepX. I had OnStep running on Wemos R32/CNC3. It worked quite well, but lacked the ability to expand. I wanted to add two heaters, a weather sensor and a temperature sensor. I was also curious to see how the new OnStepX would work.

The FYSETC S6 offers the greatest possibilities among 3d printer boards. But after reviewing the FYSETC E4 I found that for my needs it would be sufficient.

As a reminder, the modified kit is a Celestron C6n Newtonian, CG5 mount (EQ5), 2" steel tripod.

With the modification I want to redo a few little things: rigid RJ45 cables to 6p4c twisted pair phone cables, and maybe resuscitate the SHC after WiFi.

Some useful links:

Layout design:


If you need the Fritzing part file with the FYSETC E4  FYSETC E4 1.0 wb.fzpz. (it's not perfect but it's my first try) 
I will do the maintenance of heaters, LEDs, thermistor and weather before winter. RA, DEC and focuser are enough for now.  

Case:

In the At the nearest electronics shop I chose the Z80 case.
After cutting the holes and preparing the fasteners, it looks like this:

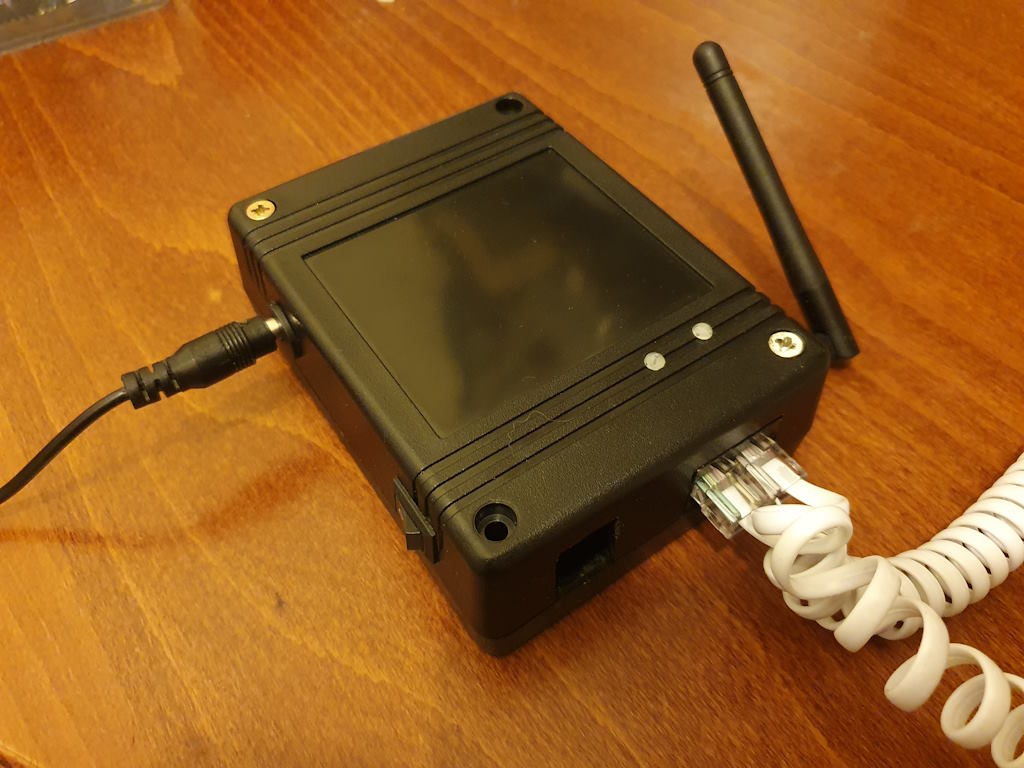
OnStepX FYSETC E4 case Z80


I/O ports and extensions:

    To start:
  • 3x rj12 6P4C (motors)
  • WiFi antenna
  • power plug 2.1/5.1
  • power switch
  • USB
    In the future:
  • heaters 2x
  • thermistor
  • led

Software

The new OnStepX system, despite having the Beta designation, seems to work much more stable than its predecessor. Maybe it is thanks to the version dedicated specifically to FYSETC E4. Just upload and it works. The built-in web server and control from the applications: OnStep Controller2 and Stellarium Mobile via IP work great. Previously, sometimes the controller started to behave strangely and it was better to restart it, now it hasn’t happened yet. I will not describe the installation separately. The instructions at https://onstep.groups.io/g/main/wiki/32794 are very exhaustive. Basic changes in Config.h (not counting network settings):

#define AXIS1_STEPS_PER_DEGREE      19200
#define AXIS2_STEPS_PER_DEGREE      19200
#define PEC_STEPS_PER_WORM_ROTATION 48000


Wiring and CG5 mount modifications

Nema17 motors unchanged: RA/DEC 17HS4401, focuser US-17HS4023.
RA/DEC gears: 60/16 = 3.75
Belts: 160mm
Engine boxes 3D printing based on Tingiverse:4170054 (there are several versions of boxes, I chose Ra-red-EQ5.stl and De-red-EQ5.stl files)
Power supply in the field 12V9Ah battery


To do :
  • Practical tests
  • Connect RTC DS3231 (I2C)
  • Connect BMP280 (I2C)
  • GPS NEO-M6 (RX/TX) 
  • Smart Hand Controller v. 1.03 (I already have one, I just need to switch it to WiFi)

niedziela, 25 września 2022

Przesiadka na montaż Celestron CG5 i podłączenie OnStep


Udało mi się kupić używany montaż Celestron CG5. Jest to wersja Sky Watcher EQ5 oferowana przez firmę Celestron. Różni się grubością nóg statywu stalowego. Celestron daje statyw z nogami 2". Wiem, że wiele osób uważa, że przesiadka z CG4 na CG5 (czyli z EQ3-2 na EQ5) niewiele zmienia. Jednak ja trafiłem na bardzo korzystną okazję i nie było się nad czym zastanawiać. Dotychczasowy właściciel przesiadł się na HEQ5 i nie chciał się już bawić starym, trochę podniszczonym montażem. A ja z chęcią zająłem się jego renowacją.

Co zyskałem? W skrócie: dużo stabilniejszy statyw - dwucalowe nogi stalowe są bardzo stabilne, dużo stabilniejszy montaż, oś RA łożyskowana, dużo lepsze umiejscowienie przestrzeni na silniczki NEMA 17 do napędu OnStep.

Co straciłem? Montaż jest większy i cięższy oraz brak możliwości regulacji rozstawienia nóg. Przy normalnym rozstawieniu statyw stoi bardzo szeroko. Ale ja nie zawsze mam tyle miejsca. Tymczasowo znalazłem rozwiązanie z zastosowaniem pasa transportowego. Poniżej porównanie CG5 i CG4.


Całość wymagała trochę pracy. Uzupełniłem brakujące zatyczki i rozebrałem i przesmarowałem całość. Bardzo mi pomógł film z kanału Astromiasto. Poniżej zdjęcie po demontażu osi DEC.


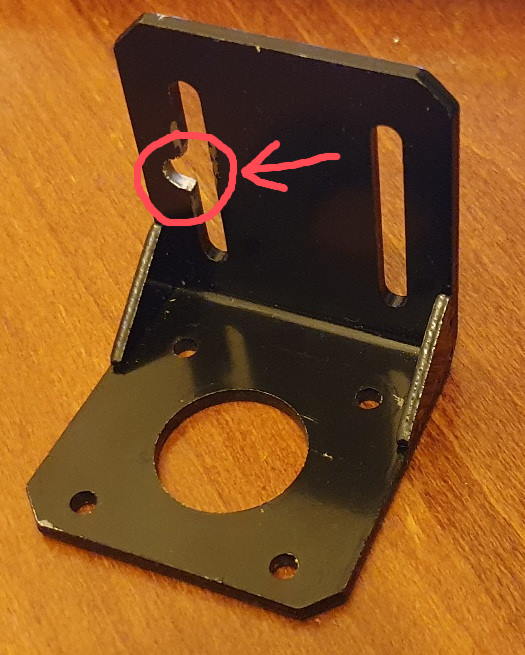
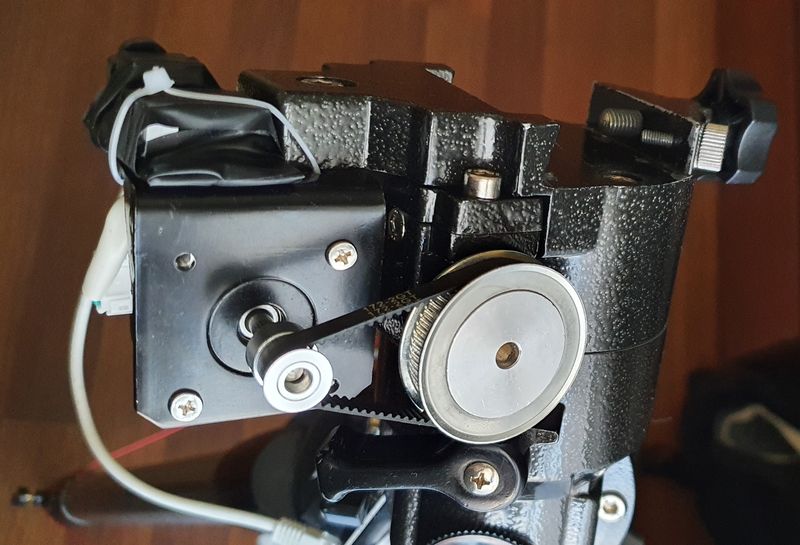
Na koniec zostało przełożenie silniczków napędu OnStep. Poniżej zdjęcia. Miałem pod ręką paski zębate o długości 172mm i 154mm. By pasowały musiałem przesunąć punkt trzymania w mocowaniach silników, jak na zdjęciu poniżej.


Ostatecznie jednak dla obu silniczków zastosowałem paski zębate 160mm. Ta długość okazała się najlepsza.

To nie wygląda bardzo elegancko, ale trzyma się dobrze i będzie czas na wypracowanie "ładnej" wersji.


Ostatnie to zmiana parametrów config.h w OnStep. Zastosowałem koła zębate 60/16=3,75. CG5/EQ5 wymagało zmiany:
Axis 1 GR1:    3.75
Axis 1 GR2:    144
Axis 2 GR1:    3.75
Axis 2 GR2:    144
Oczywiście trzeba to wpisać w Excel, a potem w generator konfiguracji.

Oba silniki to 17HS4401. Na LV8729 ustawiłem mikrokroki 64 i Vref=0,74. Będę to jeszcze testował, ale działa dobrze. Opis wcześniejszej konfiguracji GoTo OnStep zbudowanej w oparciu o Wemos D1 R32 i CNC v3, działającej z montażem CG4 jest opisany tu Part I i Part II.

Czekam na bezchmurną noc by potestować.

ToDo:

  • Popracować nad jedną nogą statywu, bo trudniej się wysuwa
  • Poprawić mocowania wtyczek przy silniczkach
  • Może osłony na koła zębate?
  • Może mniejsze koła zębate np. 48 zamiast 60? Odległość od blokady osi do brzegu koła to 1mm. Trochę mało.


środa, 20 lipca 2022

OnStep controller based on Wemos D1 r32 (ESP32) and CNC v3 Part II


Automatic translation (Original)

    In the previous section ( Part I ) I described the quick implementation of a working OnStep controller based on the  Wemos D1 R32 (ESP32) and CNC3.

    Now I had some time for corrections and modifications, i.e. Part II. 

    I changed:

  1. Case housing Raspberry Pi (Astroberry) and OnStep
    • RJ45 ports with motor outputs
    • fastening to the tube for a screw thread 1/4
    • power switch and 12V power input 5.1 / 2.1
  2. RJ45 ports on a mount and RJ45 cable splitting the signal to RA and DEC motors
  3. RJ45 to 6 pin JST PH2.0mm cable for focuser
  4. Smart Web Server (SWS) on Wemos D1 Mini ESP32
  5. GamePad BT Magicsee R1 instead of Smart Hand Controller
  6. Astroberry and Indi server connected to OnStep via USB
  7. GOTO positioning and tracking adjustment in config.h

 New items:

Wemos D1 mini ESP32
5V step-down converter
RTC DS3231 module
Kradex Z78 case
Bluetooth GamePad R1

Useful links

Wiki OnStep

OnStep author's website  http://www.stellarjourney.com/  

Wiki WeMos R32 with CNC V3 Shield

Wiki Smart Web Server 

Wiki GamePad R1 Bluetooth

RJ45 housing and ports

I know that it would be nicer to print one of the many available enclosures on a 3D printer, but I would like to remind you that this is a budget project. I had this case at hand and its slightly larger size also solved the problem of connecting to the Raspberry Pi with Astroberry installed. A bit of cutting and soldering and the effect can be seen in the photo.   

Cables

Putting it all together was harder than I thought. The cables had to be easy to connect, but at the same time they had to behave properly during the rotation of the C4 (EQ3-2) assembly. A decision had to be made where to place the housing to minimize cable bending as the telescope moved. I chose to place the housing into the telescope tube. This keeps the cable to the focuser and the DEC motor stationary. Only the RA axis cable will have to withstand regular bending. Time will tell if the cable and RJ45 connector can handle it well.    


Smart Web Server and GamePad R1

   I was about to not connect the SWS anymore. Bluetooth connectivity with OnStep works acceptable, in addition, Indi on Astroberry provides many functionalities. But experience with the use of OnStep has shown that, unfortunately, a small adjustment is often required. Doing this on your phone in the OnStep app is a bit of a pain, especially without looking at the screen. That's why I got interested in GamePad. It was a bull's eye.

    It is very easy to use and handy. By the way, because it requires a Smart Web Server, I also have a wireless connection with a greater range than bluetooth. Additional advantages of SWS are the ability to connect more than one device at a time, a website, automatic connection to the WiFi network at home, and if it is not available, then issuing your own AP. No need to constantly restart the whole thing. All I had to do was provide a stable 5V. The one taken from the CNC was too weak. A Step-Down converter connected directly to the input 12V solved the problem.

Installing SWS for GamePad

Detailed instructions for installing SWS with GamePad support is  here . In short, you should:

  1. Download the SWS code from  GITHUB  by selecting Code -> Download ZIP
  2. Unpack to some directory and open in Arduino IDE
  3. Add in File-> Preferences "Additional Boards Manager URLs" value "https://raw.githubusercontent.com/espressif/arduino-esp32/gh-pages/package_esp32_index.json"
  4. In Tools> Motherboard> Boards Manager to install ESP32 version 2.0.0
  5. Set in the menu Tools-> Board-> MH ET LIVE ESP32MiniKit and Partition Scheme-> No OTA (Large APP)
  6. Select the port that will appear after connecting ESP32 to USB (the number can be checked in the Device Manager)
  7. In the Extended.config.h file, turn on BLE_GAMEPAD ON and enter the MAC address of our GamePad in the BLE_GP_ADDR line. 
  8. Press "Upload" and wait for the message that it was successful.

New connectivity

Connectivity with OnStep can be provided in 4 ways.

1.  USB cable  connected to the Wemos D1 R32 port. In my case, this is how I connect to Astroberry on the Raspberry PI 4B, which is running the Indi server. 

2.  WiFi connectivity and control via IP port and Smart Web Server page. Very stable and works on multiple devices simultaneously.

3.  Bluetooth connectivity . Works, but requires pairing and re-pairing after restart. At least that's how it is with me.  

4. Wireless GamePad controller . If the MAC address of the device is correctly entered in the SWS configuration, then after switching on, its diode will flash blue for a while, when it goes out it means that the connection has been established. You should also activate the mode by pressing M and D simultaneously (the diode will blink once). From now on they work:

  • Joystick = N, S, E, W
  • Trigger up = Focuser -
  • Down trigger = Focuser +
  • A = Go to last location
  • B = Spiral search
  • C = Speed ​​reduction
  • D = Speed ​​increase
  • M = Park / UnPark (M is also an "emergency stop" of motors)

Summary of the second stage

The tests are still ongoing, but everything works quite stable and quite precisely. I will do the proper tests during my foray into the dark sky. 

czwartek, 7 lipca 2022

OnStep controller based on Wemos D1 r32 (ESP32) and CNC v3 Part I

Automatic translation (Original)

   I decided to make a new OnStep controller based on the Wemos D1 R32 (ESP32) and CNC3. The controller based on the Arduino Mega + RAMPS clone works, but has performance limitations, which in practice results in  lack of precision during long position changes. Recently, on the OnStep website, it is written directly that it is too slow. ESP32 seems more promising. Additionally, it is small and requires almost no soldering and I had 2 weeks before going on vacation that I have to do it already :)

    Wemos D1 R32 (ESP32) + CNC v3 components are available for purchase immediately. Are cheap. I can also use some work from the Arduino Mega project.

 Components:

Wemos D1 R32 ESP32
Shield CNC v3
RTC DS3231 module

Case 
Stepper motor driver LV8729 2 pcs and A4988 1 pcs
DC 2.1 / 5.5 socket and a few meters extension cord for this plug
bistable rocker switch


A few links

OnStep group website

Wiki page 

Project author's website  http://www.stellarjourney.com/  

Wiki: The WeMos R32 with CNC V3 Shield

Thread about LV8729 adjustment

Realizations by assembly

Useful thread about LV8729


Connecting to the CNC

CNC v3 was created to support 3D printers. But OnStep has very similar needs: support for several stepper motors by stepstick controllers, connecting devices via serial and I2C ports.

Here's what I connected in the current version of the controller: 

1. Two LV8729 controllers to control telescope's RA / DEC axis motors and A4988 to control the focuser.

    Jumpers for setting microstepping are led out under the controllers. The speed is determined by applying voltage to the appropriate stepstick pin, i.e. by shorting the appropriate jumper. For LV8729 I set 64, for A4988 16. Calculator, for example here. And here is the description of LV8729.

2. RTC DS3231 module for operating the clock on the I2C link 

The page describing the connections suggests to give up the clock, but I already had it from the previous project, so I connected it. It is enough to properly connect to the I2C output and set the module model in config.h (at the configuration generation stage). 

Power

To work, the controller needs voltage in various ranges for the microcontroller and the CNC. 12V is in both of these ranges. I have a 5A power supply and a 9AH battery, so I chose this power supply. I connected everything to the 5,5 / 2,1 plug on the housing. 

Parameter Configuration and Generator

The OnStep configuration is stored in the config.h file. Manual modification is tedious. Fortunately, there is a configuration generator page from which you can generate our file. The procedure is as follows:
  1. In the excel document (download here) you need to set the parameters of the drives.
  2. The data must be filled in on the Configuration Generator page  . Some must be copied from the fields listed in excel.
  3. Press "Generate"
  4. Replace the downloaded file with the config.h file in the OnStep directory.
  5. That's all point 7 in the chapter below.
Several values ​​need to be explained.
    
    Excel:
  1. Stepper-Steps - the number of steps per revolution of the stepper motor. I have 200. 
  2. AXIS1_DRIVER_MICROSTEPS - microsteps set for tracking to RAMPS. For me 32. 
  3. GR1 - gear ratio on gears or planetary gear. For DEC, I have 60 teeth out of 20, which is a value of 3. For RA, I have 40 teeth out of 16, which is a value of 2.5.
  4. GR2 - the number of full revolutions of the telescope micromovement knob for 360 degrees rotation of the telescope tube in a given axis. If you do not find these parameters for your assembly in Net, it only remains to measure it empirically. For example, set the tube vertically (a spirit level will be useful) and rotate it until it reaches the level. Then you need to multiply it by 4. For my CG-4 these are: RA = 130, DEC = 64
  5. SLEW_RATE_BASE_DESIRED - expected tube speed in fast mode (in ° / s). If you give too high a value, the equipment may not be able to cope or the motors will work loudly. At the moment I am giving 1. It seems to me a good compromise between volume and speed.

    Generator:

  1. MICROSTEPS_GOTO - microsteps for fast motor movement. For me 2.
  2. Automatically Start Tracking  - useful when we test the motors and we do not have the ability to control the telescope's movements yet. But then it's better to turn it off.
    Additionally, I changed in the generated config.h:
    • MFLIP_SKIP_HOME  to ON, thanks to which it does not return to the starting position when changing the position at a long time
    • PIER_SIDE_PREFERRED_DEFAULT on EAST. I perform the tests on the balcony and I prefer the telescope to always be positioned on one side of the mount, in my case the eastern one.

Installing the software

Detailed instructions for installing OnStep on ESP32 + CNC3 are  here . In short, you should:

  1. Install the Arduino IDE
  2. Download the OnStep code from  GITHUB  by selecting Code -> Download ZIP
  3. Unpack it to some directory and open OnStep.ino in IDE
  4. Add in File-> Preferences "Additional Boards Manager URLs" the value "https://dl.espressif.com/dl/package_esp32_index.json" (if there was something, add a comma)
  5. In Tools> Board> Boards Manager to install ESP32
  6. Set in the menu Tools-> Board-> ESP32 Dev Module
  7. Select the port that will appear after connecting the board to USB (the number can be checked in the Device Manager)
  8. Overwrite the config.h file generated in the chapter above.
  9. If you do not have a library for RTC DS3231 by default, you will get an error. Go to Sketch-> Include library-> Manage Libraries and search for 'RTC by Makuna' on the list of available libraries and install.
  10. Press "Upload" and wait for the message that it was successful.

Communication

There are 4 ways to connect to OnStep.

1.  USB cable  connected to Wemos D1 R32 port. In my case, this is how I connect to Astroberry on the Raspberry PI 4B, which is running the Indi server. 

2.  WiFi connectivity . Requires the ESP8266 microcontroller to be connected to the serial port on the CNC. I have not implemented it at the moment.

3. Bluetooth connectivity . Since bluetooth is on ESP32 it works without any additional work. Yes, you can connect applications on your phone and computer. It works very stably  

4.  Ethernet port . I did not explore this solution because it was not practical for me. Details are in the OnStep Wiki.

Control

The best description is here . A few comments from me. ASCOM Driver is required for Windows. Then programs such as Stellarium, Cartes du Ciel or Sky Planetarium run. The driver allows you to handle the connection via a USB cable or via bluetooth.
But parking, unparking, star calibration or four-way arrow correction is impossible or only partially possible with these applications. Most importantly, OnStep needs to set the date and location to work properly. Since I do not have a GPS module, you have to start with the OnStep application on the mobile phone first. There, first set the time and perform the first offsets and calibrations. The control applications on the computer are free of charge, they are payable for the phone (except for the aforementioned OnStep).

Scenario:
  1. OnStep start (a few seconds after starting you hear a click from the motor)
  2. Searching for a bluetooth device called OnStep and connection (it works fine for me if I delete the remembered connection every time I restart OnStep and search again) 
  3. Launching the OnStep application on Android (if the device was restarted, it is better to kill the application and restart it after BT connection)
  4. You need to configure the connection type once in the application. Select the three dots in the upper right corner and click Connection.
  5. There, it is also worth setting "Observing Sites" to your geographic position.
  6. Setting the time and date in the "Initialize / Park" menu
  7. Next, you can select the position in this application or switch to, for example, Stellarium Mobile in the PLUS version (it cost about PLN 40, payment in the application). It will work on the same bluetooth connection. Once set, it will remember the settings. Here you can see the position of the telescope, you can also indicate a new position on the map.  
  8. If the telescope begins to diverge with the indicated target, you can always switch to the OnStep app. Use the Tracking option to correct and update the display.
  9. Sky Safari 6 PLUS works similarly to Stellarium (unfortunately it also costs about PLN 36). One note here: do not turn on the time setting, because it will set the time shift incorrectly. I haven't figured out why yet.

Case

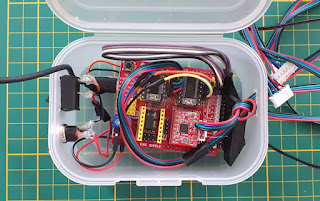
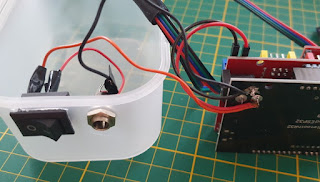
    I had little time so I applied what was at hand. The housing from the food storage box turned out to be the perfect start. I only added a 5.5 / 2.1 power socket, a switch and led out the cables to the motors (in the future there will be a change to RJ sockets. Of course, it is worth thinking about the method of attaching the telescope tripod to the leg. I used two Velcro straps.  


Summary of the first stage

The controller is working. My budget (OK, very low budget) astrophoto set: Celestron C6n (150/750), SVBony SV105 planetary camera for the finder and T7C compatible with ASI120 for planetary photos gives me a lot of joy at the moment. The holiday was successful. 

Next steps to do / describe 

  1. At first I was thinking about resuscitating the Smart Hand Controler, but I just ordered the GamePad bluetooth from this Bluetooth GamePad Option description .  
  2. GamePad requires Smart Web Server based on additional ESP32. Best in the D1 mini ESP32 version, although others are also suitable.
  3. Replacement of cables for motors on RJ45 with rigidly fixed ports on the assembly. Choosing RJ45 over RJ11 or RJ12 is conscious. A much larger selection of sockets and cables, and for a much lower price.
  4. Connecting Onstep to Astroberry on Raspberry Pi. The USB connection is already working. This allows applications to connect to the Indi server on the Raspberry Pi.
  5. The use of PHD2 operating on Astroberry for guiding, i.e. correction of following the movement of the observed object.
  6. New handy case, housing OnStep and Raspberry Pi. The Kradex z78 was on hand .